How to Protect Sensitive Student Data on Flash Drives
For better or worse, the flash drive has become a ubiquitous tool for transporting data on campus. Here's how to keep that data secure.
- By Emmett Dulaney
- 04/28/16
An interesting development has quietly transpired over the past decade: The flash drive has become a staple for instructors everywhere. They carry one into each classroom and use it to hold slides, papers, grades, backups and almost everything else imaginable. Part of the reason for it gaining such momentum can be traced to the universal acceptance of USB technology — it is hard to find a computer anywhere that does not have USB capabilities — and another part is the increase in the capacity of the drives coupled with their decrease in price. Ten years ago, you were doing well to have a drive that could hold 1GB of data, and today you can purchase a drive that holds between 32GB to 256GB for a fraction of the cost you previously paid.
Although flash drives have become omnipresent, one topic that has not been scrutinized as much as it deserves is the protection of the data stored on them. While flash drives' small size is one of their greatest features, it also serves as a weakness in that it makes it easier for them to be misplaced or stolen. You need not look far to find tales of the costs and dangers associated with losing the data on these drives. In one case, a Bowling Green State University accounting professor could not locate a flash drive containing many years of student records and he was forced to pay for LifeLock protection for those students and endure a public relations nightmare. In another case, a flash drive was taken from a vehicle belonging to an employee of Portland Community College. That flash drive contained information on 2,900 recipients of the Oregon Food Stamp Employment and Transition program. Since the information contained names and social security numbers, Debix Credit Protection had to be offered to each of the affected individuals.
To protect your data from prying eyes, it is highly recommended that you add encryption to the flash drives you carry from place to place and have come to rely on. It is possible to buy drives with encryption built in, but they cost considerably more. While the more expensive drives tend to have more features beyond just the encryption component (such as longer life memory chips, self-destruction capabilities, etc.) and thus can be better overall choices, this article will focus on how to add encryption to the drives you currently have and protect your data should it fall into the wrong hands.
Encryption Options
Just as there are many options available when choosing which LMS to use, which projector to buy or anything else, there are many choices in encryption programs. In the open source world, TrueCrypt was popular for a while, but development of it ground to a halt a little over a year ago. Symantec puts out EndPoint and Jetico has BestCrypt, to name a couple in a sea of many others. All offer AES (Advanced Encryption Standard) encryption and as long as the password is not shared, the data should remain inaccessible. AES is a symmetric algorithm that supports a block length of 128 bits and key lengths of 128, 192 and 256 bits.
Which solution you go with should be based on your needs, your budget and your hardware. Encrypting a drive on one platform can render it difficult to access on another if you're moving from Windows machines to Linux machines, Mac OS X and so on. Fumbling around in the classroom, downloading software before you can open a drive or losing minutes trying to find a work-around should never be considered viable options.
Beyond Encryption
If you are looking for additional security, consider using flash drives that are waterproof, tamperproof and delete the data stored on them after 10 failed access attempts. Two such possibilities are the Kingston DataTraveler Vault Privacy 3.0 and the IronKey drives.
If your environment consists primarily of Microsoft Windows-based PCs, then BitLocker is a viable solution. Available in various editions of the Windows versions that have been released since Vista, BitLocker can encrypt flash drives with AES and keep the data from those without the password. It should be pointed out that some in the security profession take exception to BitLocker not being open source and no longer including an added feature called the Elephant Diffuser, but the pros far outweigh the cons. Among the pros are that BitLocker is already included with the version of Windows you are likely using at your desktop (Windows 10 Pro and Enterprise; Windows 8 Pro and Enterprise; Windows 7 Ultimate and Enterprise; Windows Vista Ultimate and Enterprise) and supported by the version of Windows you are likely to find in the classroom (every release of Windows since Vista); it supports multiple levels of AES encryption; and it easy to use. Given those attributes, the following walks through how to use it to protect an existing flash drive.
Turn On BitLocker
To start the encryption of a flash drive, simply right-click on it within a newer version of Windows (Vista, 7, 8, 10), and choose Turn on BitLocker from the pop-up menu. Technically what starts is a version of BitLocker known as BitLocker to Go: The drive will initialize (a very short operation), and then you will be asked to choose how you want future unlocks to be done (see Figure 1). The choices are to use a password and/or a smart card. Unless you are already using smart cards in your institution — which is unlikely in the vast majority of educational settings — choose only the password option and give a unique value that mixes and matches letters (upper and lowercase), numbers and symbols.
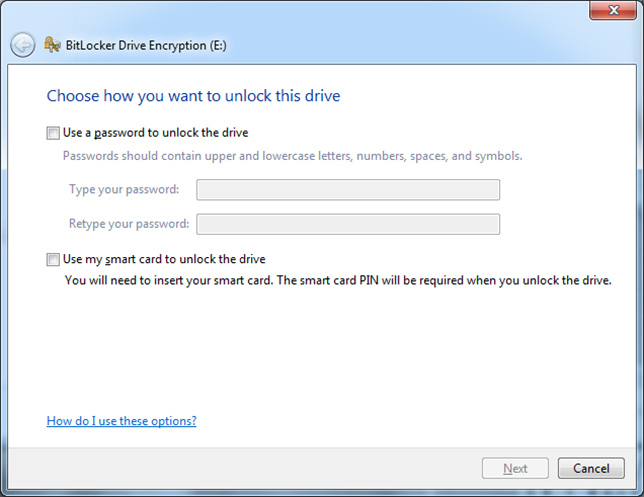
Figure 1: Choose a password to use with the drive from now on.
After clicking Next, you will be prompted for what to do with the recovery key. The two options are to print it or save it as a text file. The recovery key is what you will need to use to access the data if you ever forget the password. Since the odds of losing a piece of paper with a cryptic value on it are high (or having it fall into the wrong hands), saving it to a text file (which can always be printed in the future if needed) is recommended.
Click Next and choose to really go ahead and encrypt the drive. A dialog box will tell you that encryption might take a while depending on the size of the drive. The reality is that encryption will take a while regardless of the size of the drive. Be prepared to let it run for a while and never begin the operation if you are going to need the drive within a few minutes. There is an option to pause the encryption before it finishes if you run into an emergency situation, but you want to avoid using this if at all possible particularly if you are working with a drive that already has files on it: Stopping the encryption process, and in particular removing the flash drive from the machine, could potentially damage files.
Once the encryption is finished, you will be prompted to give the password to access the drive (see Figure 2). Be very careful with the choices on this dialog box. One of the choices allows you to see the characters typed – which also allows those standing near you to see the same values (and explains why you would never want to use the same value here as for a password to anything else). Another choice allows you to avoid having to give the password to the drive again on this machine. Both of these options undermine the very security that BitLocker is being used to create.
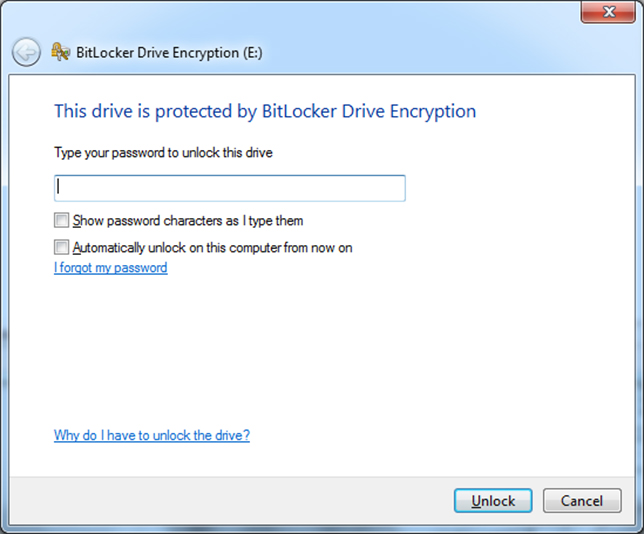
Figure 2: The password must now be given to access the drive.
If you give a wrong value, the drive's contents cannot be accessed. There is not a maximum number of tries — which is a weakness some hardware-based solutions overcome — and the drive can still be seen by Windows, though the data remains protected. If you access it on a Windows machine that does not have the ability to encrypt new drives (such as Windows 8.1 Core), then a more limited version of BitLocker to Go opens (see Figure 3), but either way you can still read the contents of the drive and newly added data is encrypted on the fly.
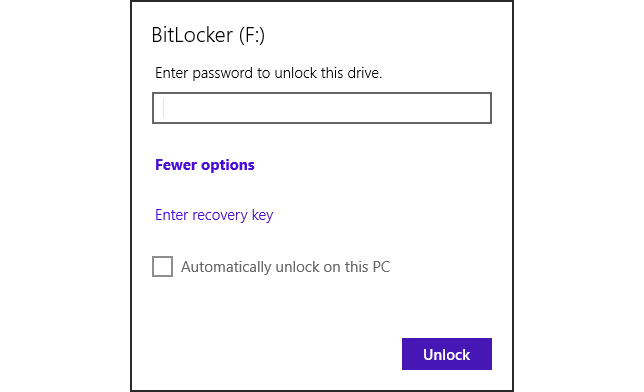
Figure 3: The password prompt in Windows 8 Core.
You have now successfully encrypted the drive's contents and can rest a lot easier knowing that if the drive becomes lost, the student data on it should stay safe.
Some Closing Notes
The National Security Agency has several classifications for data, and the requirements for encryption vary based on the classification. While 128-bit encryption is required for data classified as SECRET, 256-bit is needed for data classified as TOP SECRET. The default with BitLocker is 128-bit, but this can be changed to other values, including 256-bit. To make the change, you need to use the Group Policy Editor (see Figure 4). A great resource on the changes to make can be found in the Microsoft TechNet library here.
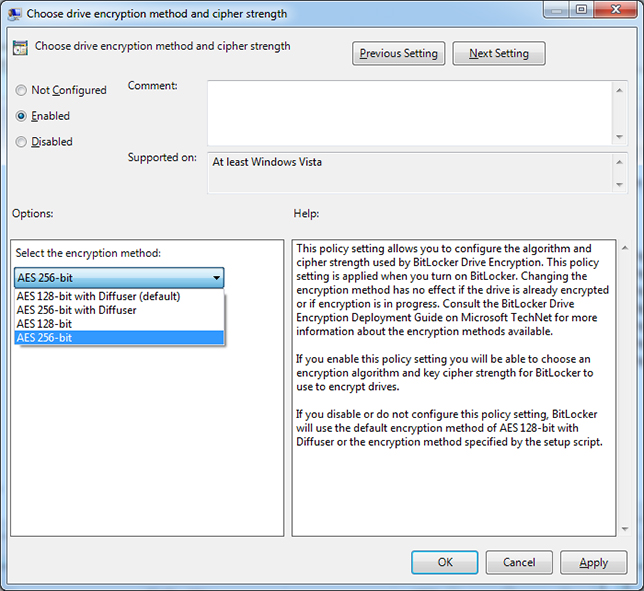
Figure 4: You can increase the level of encryption BitLocker applies to new drives.
If for some reason your institution still has really old computers in the classroom and you are running versions of Windows prior to Vista, you can still download the BitLocker to Go Reader, install it and use it to open the drives in read-only mode. Along that line of thinking, to protect the data on a drive not just from prying eyes but from damage, it is a good idea to craft a policy blocking USB ports on classroom computers from write operations. The policy should limit who can save data outside the network and restrict the saving of data to only those authorized to do so. This can keep an infected classroom computer from being able to write a virus or other malware onto your flash drive once you've unlocked it.
Lastly, it needs to be ardently understood that once a drive has been encrypted, if you forget the password (which can happen if you set the drive aside and never use it for five years) and lose the recovery key, you will not have the ability to access the data. Use the technology to protect your drives, but know that risk also exists and be willing to accept it.