Moodle Primer Part 2: Administering a Course
- By Emmett Dulaney
- 10/10/07
As fun as
creating a course in Moodle is (the subject of
part 1 of this two-part series), eventually it will go live, and the real excitement can begin as administration kicks in. The first thing you will come to realize is that while you believed you had thought through every single thing, you missed about half.
Not to fret: Moodle is as adaptive once the course has gone live as it is during creation.
In this article, I'll walk through common issues and changes and how to address them. While it isn't possible to be inclusive of every problem that can arise in a course, this should provide a good baseline for predicaments you may find yourself in.
Seeing Who Has Done WhatTo see who has accessed the course, you can click on the Participants link on the main page. This will show you such things as the user name and how long it has been since their last access. You can reorganize the list in any order you want and from here, and you can click on any user and see the variables associated with them.
Of those variables, clicking on the Activity Report tab will show you how many times they looked at each resource and when they last did so.
From the main page, you can also click on any activity (Quizzes, Resources, Assignments, etc.) and see how many users have accessed each ("14 students have made 14 attempts" and so on).
If you click on the attempts, you will see the list of users and the variables about their access of that item. For example, on a quiz, you will see when each user accessed the quiz, when they completed it, how long they spent on it, their score, and the feedback given to them.
One of the most useful links here is Item Analysis, which will give you the psychometrics on each question.
Finally, from the main page, you can choose Reports and view the log files to see any or all activities, actions, and participants for any time period that you specify.
Changing the Outline and ItemsAs the course progresses, you may find that you are not able to cover material as quickly as you thought you would. You may also get a dozen e-mails from students informing you of a spelling error in a label, a link that does not work, or something similar.
All of these can be addressed by clicking "Turn editing on" beneath Administration.
Fig. 1 shows the view with editing off, and Fig. 2 shows the same view with editing on.
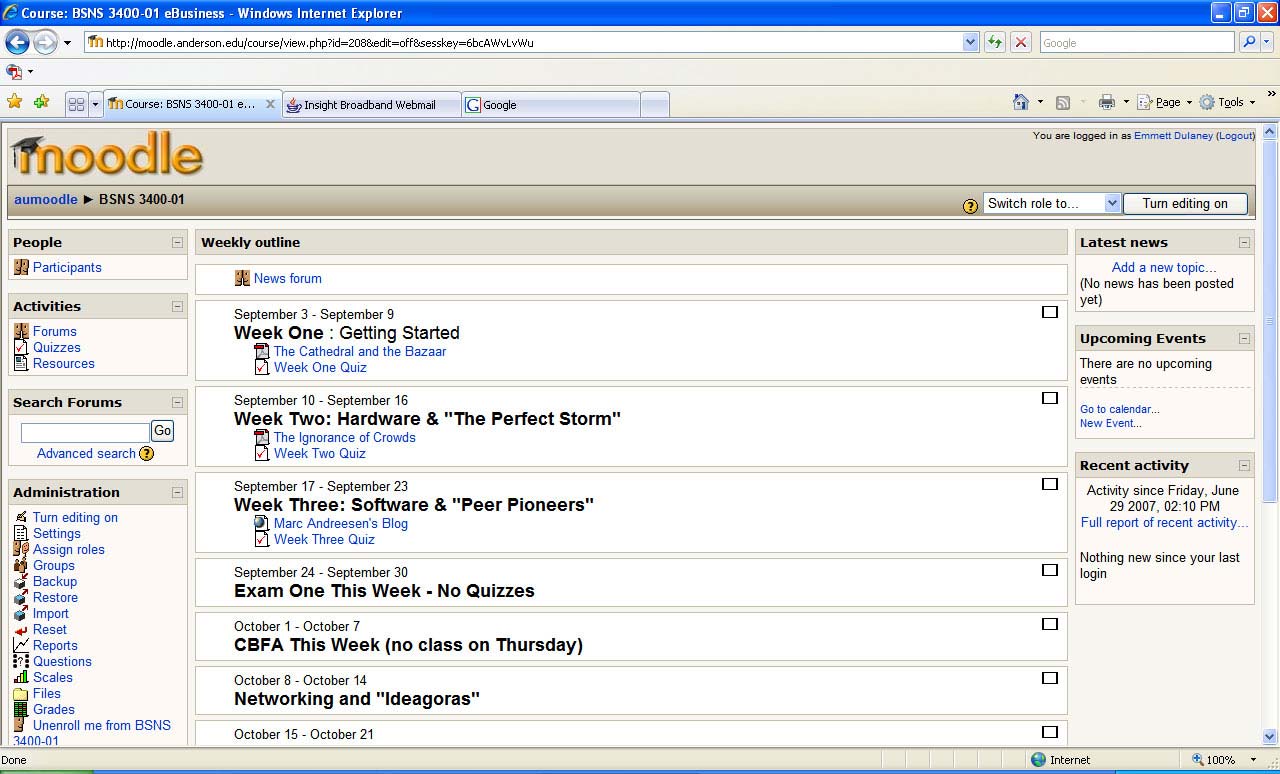
Fig. 1: The Outline view of an existing course. Click to enlarge image.
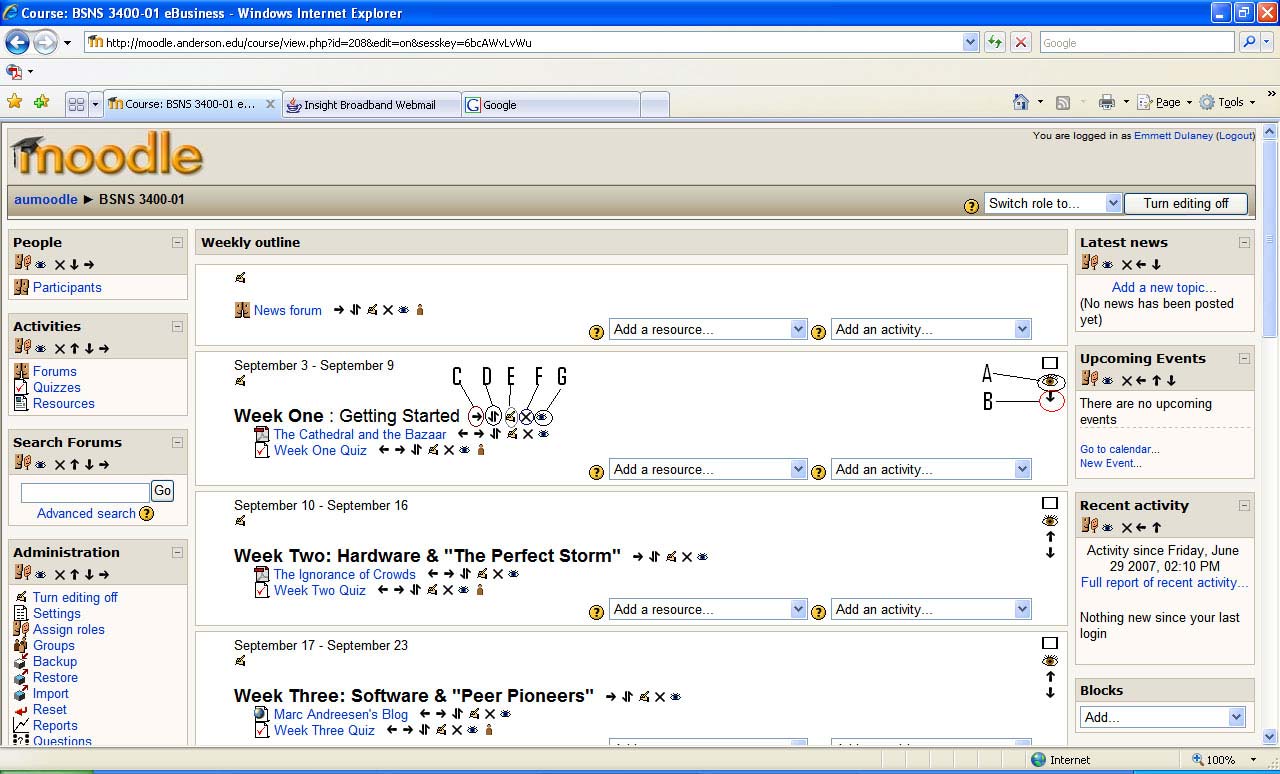
Fig. 2: The Outline view with editing on and callouts added. Click to enlarge image.
With editing on, you can add new items as you did when creating the course (both resources and activities). More importantly, though, you can also change the existing items as illustrated by the icons. Since the icons are not nearly as intuitive as they could be, I've added callouts and will discuss the key ones, referencing each by its callout:
A: This allows you to hide the entire week/topic. This can be useful if you find that you just have too much material and decide not to use it this time, or you don't want students jumping ahead. If the latter is the case, you can hide it now and unhide it when you do want them to focus on it.
B: The entire week/topic can be moved. If you get behind--think snow days, server outages, and the like--and need to move the assignments from here down, simply click the arrow icon and move the material around.
C: This tool isn't nearly as powerful as the others here but is handy. The indent tool allows you to move the listing left or right. As you look at the figure, you'll notice that beneath each label, I've indented the resources and activities for that week. It doesn't change a thing, but is aesthetically appealing.
D: Instead of moving an entire week or topic's worth of material from one to another, you can move just this item. When you click the icon, the entire outline changes with placeholders appearing throughout, and you simply choose which one you want to move the item to.
E: This takes you into editing mode for the individual item and is useful for correcting those spelling errors, link mistakes, and so on.
F: When you come to the realization that this item just isn't as important as you thought it was, you can choose to delete it.
G: Just as you can hide an entire week/topic (callout A), you can do the same for the individual resource or activity.
Once you use these features a few times, their meaning will become familiar to you, and you'll be able to make changes quickly and simply.
Changing Quiz ItemsOne of the biggest issues that will arise will be with quiz questions. Students will come up with answers that you never considered, and you must decide how you want to handle it.
As the course progresses, the best way to keep track of progress is by clicking on the Grades option beneath Administration. This will bring up a display similar to that shown in Fig. 3. (Note: the names of the students would appear on the right and left but have been grayed out in the figure to protect their privacy).
After adding it as a possibility, go to the Results page for the quiz, shown in Fig. 7, and click Regrade. This will start from scratch and regrade each quiz that has already been taken and come up with a new score based upon which answers are now right and wrong. (Theoretically, you could go the other way and take out some of the answers that were previously graded as correct, if you needed to).

Fig. 7: The Results page for the quiz. Click to enlarge image.
Final ThoughtsAs you use Moodle, you'll come to respect it. After using it for a while, you'll come to wonder what you did without it. It's a powerful course tool that can be used in conjunction with a traditional course or in place of it. With each version that comes out, it becomes more powerful and feature-rich.
The last thought I'll share is one that every administrator should/must know: Back up often. As wonderful as the tool is, and as dependent as you will become on it, you won't ever want to face a scenario where you find yourself starting from scratch, and backups are your best insurance policy against that dystopia.